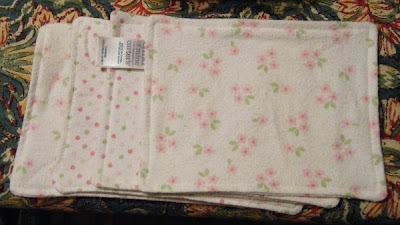
 Choose a fabric that is 100% cotton. You want something soft, but absorbent. Do not use fleece! When in doubt, drip a few drops of water on your fabric... does it absorb or roll off?
I opted to upcycle a set of 3 coordinating receiving blankets from when Sasha was a baby. For my second batch, I did the same with a set of 2 coordinating receiving blankets. |
 I started with a guide cut from cardboard - 6½ x 8½ inches. Kind of ironic that it is cut from a disposable diaper box! |
 I started out using a rotary cutter and using the cardboard rectangle as a guide, with cardboard as a cutting board. I do not recommend this process. I immediately switched to a pen for tracing around the cardboard, plus scissors. |
 Lines for cutting, Batch #1.
On my second batch, I had much better luck using a ruler to mark the fabric and skipping the cardboard altogether. It turns out that my cardboard guide wasn't very exact. At all. |
 Place your two pieces of cloth face-to-face or "right side in." |
 Use a straight stitch along the edges, making sure to leave a gap somewhere for turning right-side-out.
(I did this in the center of one end.)
Another important trick - be sure to allow a wide seam allowance on the side / end where you leave this gap. This will make it much easier to do the top stitch in the last step. |
 Here is the special trick my friend showed me. You want to straight stitch around the edges, but switch to a zig zag a few stitches before (and after) a corner. You want the "zig" to be toward the inside of the rectangle when you actually turn the piece. (I understand that we get nicer, neater corners with this trick.)
Trim these corners as shown before turning out. I used the point of a small pair of scissors to help push the points out to nice corners when I turned out my rectangles. |
 After turning, add a straight stitch around the edges. This step might come out neater if you press the piece first, but I'm a lazy crafter. |
 Now if you really want to dork it up...
I had a lot of fun adding the tags from the original blankets to a couple of my cloths. I think they're cute, even if this first one was a bit too deep into the fabric. |
 I completed 4 Family Cloths on the first night. I loved using the coordinating fabrics! I alternated which ones I matched up for the cloths. |
My second batch of Family Cloths left a little scrap fabric. I made 4 more cloths measuring
5 x 7 inches and let Sasha use them (and/or use them on her myself).
In case you missed it, I wrote about my trial of
Family Cloth for the January Natural Parenting Carnival, which published yesterday.
You can see more green photos on Natural Parents Network today on their
Wordless Wednesday: Green Resolutions.
 Here is the special trick my friend showed me. You want to straight stitch around the edges, but switch to a zig zag a few stitches before (and after) a corner. You want the "zig" to be toward the inside of the rectangle when you actually turn the piece. (I understand that we get nicer, neater corners with this trick.)


